Activating and Managing a Tide License
This guide shows you how to view, activate, renew, and manage your Tide license for a realm from the tide-console. By the end you will know where licensing lives in the console and which actions to take to keep your realm licensed.
For background on what a license is and how it relates to the rest of the admin console, see the Admin Overview. For how the checkout, activation, and renewal flows work under the hood, see Licensing.
Before you start
- You have a running TideCloak instance and a realm provisioned through the Set up this realm wizard. If you do not, follow the Quickstart first.
- You can sign in to the tide-console for that realm.
- The wizard already provisions an initial free-tier license when it sets up the realm, so you do not activate one from scratch to get started.
Open the Licensing screen
- Sign in to the tide-console for your realm.
- Turn on the Advanced toggle (bottom-left) to reveal the technical sections.
- In the left nav, open Tide, then select the Licensing tab.
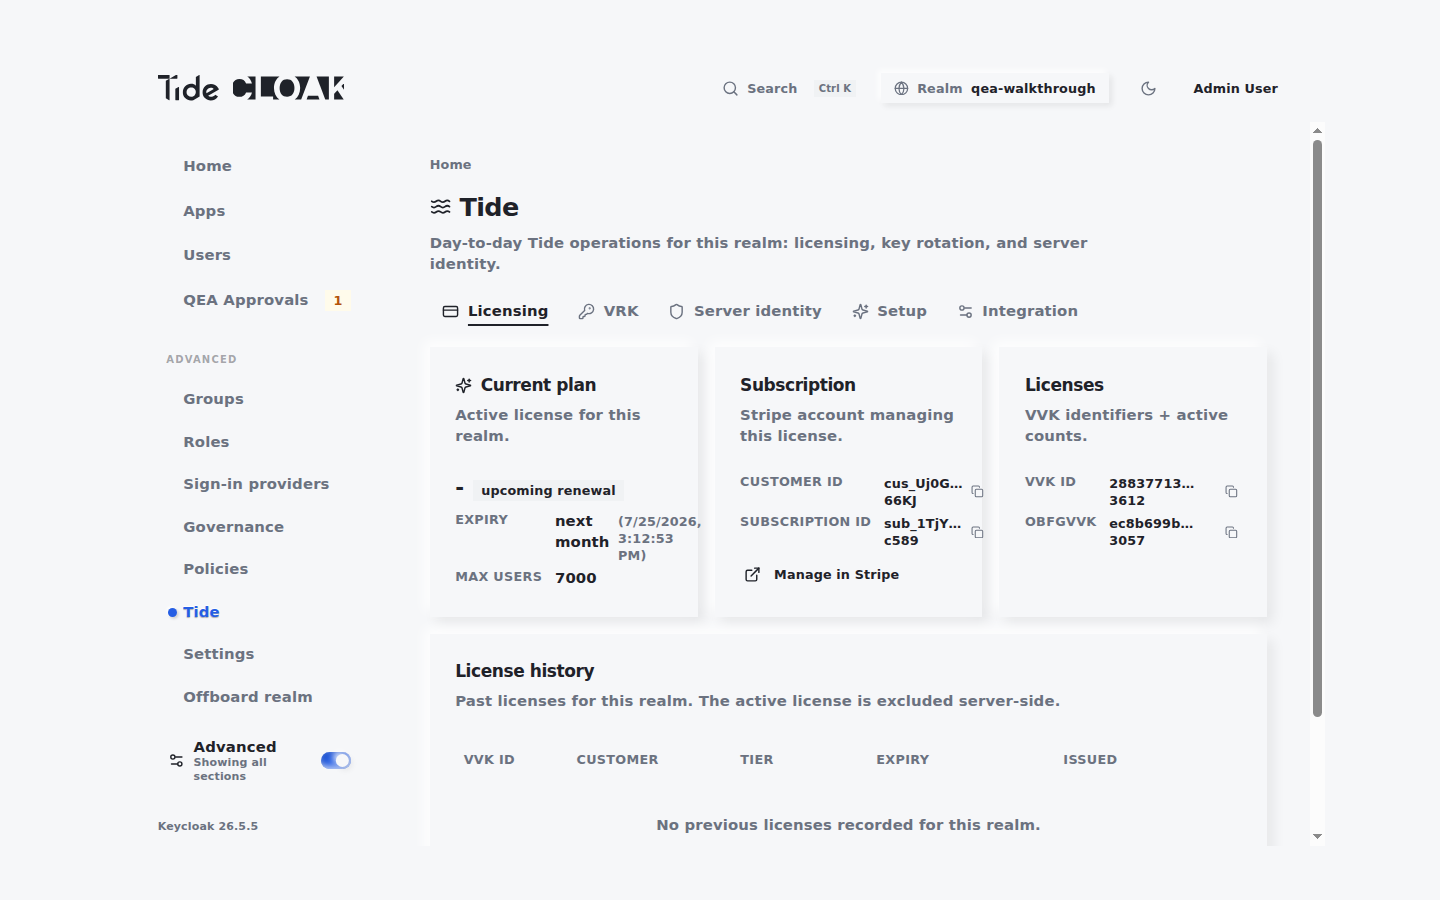
View your current license
On the Licensing tab, read the dashboard cards:
- Current plan: the active license for this realm, with its expiry, max users, and any upcoming renewal.
- Subscription: the Stripe account managing this license, including its customer and subscription IDs.
- Licenses: the VVK identifiers and their active user counts.
- License history: past licenses for this realm.
Activate or upgrade a license
To move beyond the provisioned free tier:
- On the Licensing tab, open the Current plan card and start a subscription.
- Enter your email address.
- Complete the Stripe checkout to Subscribe.
- You are redirected back to the Licensing tab, where the Current plan card now reflects the new tier, expiry, and user limits.
Manage an existing license
- On the Licensing tab, find the Subscription card.
- Click Manage in Stripe.
- In the Stripe billing interface, choose your action:
- Upgrade Plan
- Cancel Plan
Changes apply without disrupting authentication for the realm.
Complete a renewal
TideCloak renews automatically every 30 days. To finish each renewal:
- Watch for the renewal email containing a Secure Settings link.
- Click the link to re-sign your configuration with the new license key.
Re-signing your settings is the only manual step a renewal requires.
Automate license tasks
If you are scripting deployments or CI/CD:
- Use TideCloak's CLI or API (where enabled) to script license requests.
- Watch for renewal emails in your pipeline so you can re-sign config automatically.
- Store current license details securely in your config management system.